Sunday, 22 April 2012

Sewing Tag

Continuing from having followed the Creative Chemistry course, I thought it was more than time to make use of some of the techniques that I have been shown. I don't own all the ranger products used in the course, but to be honest, I think i prefer at this point to play with what I do have, and see how the results vary. I quite like the paint resist technique, where you stamp with paint and then layer inks over the top. I have quite a few sewing style stamps, which I have been collecting, but thought it was about time I used some this week. I'm still loving my crackle paint as well at the moment, so a little bit of that did sneak in as well! Thanks for looking :)

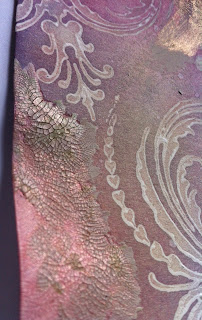
Ok to start, I stamped one of my very favorite "La Blanche" stamps with some Snow Cap, Adirondack paint.

Added some distress inks- Think this was Festive Berries

More ink, - Dusty Concord

polished the surface to remove any ink that was sitting on the paint.

Added some distress crackle paint to the surface in some areas, Ive used tattered rose, and old paper

I Let the paint do its stuff, then I brushed over some Moon Glow, Glitz Spritz, in Medieval Gold. This is a spray, but I didn't want it going everywhere, so I dipped a brush in the bottle and applied it by brush instead of the spray for more control. I only added it to the areas with paint.


Started to build up the design a little now, added a Anna Griffin sewing machine stamp with Archival ink, and started to layer some bits of ribbon and lace.

Added Rosette die, made from some bits of scrap paper., Ive sprayed this with the same, Moonglow spary, as it was looking a bit clean for me :)


Yay, the finished tag! I'm quite happy with the end result, think I would like the images to have more colour if I work this way again, so may stamp them separately in the future and cut them out to layer over the top. The little quote stamp is from a Creative Expressions Vintage sewing set.

Close up


Thanks for looking :)

Thursday, 12 April 2012

Anniversary Card

Well, Ive been married for 6 years today, and so today's post shows the card I made my other half.   As I've been working on the Tim Holtz class, it has kind of gone a little distressed, but overall I do really quite like it :D I did want to attach some acetate hearts I've also got, but all the glues I had, showed though( Any advice about best way to stick these would go down well!)I didn't want brads or other stuff on them so was rather stuck, they are back in the drawer again now!, never to be used! Hope you like, WendyX
 I started with a selection of heart shaped chipboard shapes, some had a patterned finish, so I've gessoed them to get a more matt finish.

I then applied a thick layer of Distress Rock Candy Crackle Paint. leave them to Crackle, mine took about an hour or so.

They formed a great crackled surface

The card base, I bought a range of clear A5 scrapbook albums ages ago, but ive never used them, so I though I make a clear card from two of the pages. This is the back page, which Ive used a piece of K&C stickyback paper onto (From the "Handmade" Adhestive pad) Added a little distress around the edge, and stuck it on!

This will become the front, and all the hearts will be stuck to.

Now the hearts are crackled, ive added some Moon shadow Ink ( Mystic Malachite) Ive had this ink ages and it is just soo beautiful when dry, its has a lot of mica in it. So I know it looks horrid now, but it's beautiful when dry.

I also crackled a couple of hearts that were already a printed red. This is them in the process of being inked.

This is the large white heart when dry from the ink- no longer white, I have also added a bit of red distress ink around the edge, just to remove the last traces of the white base.

The red hearts, when dry from the ink.

The ink does really loosen the crackle so, to protect it I coated all the hearts with a layer of Glossy Accents.

The final card when placed together, Just needs a bit of ribbon to tie the pieces together so they open like a card. Added a little true Love printout from my recently received MCS Cd. Also used my punches to make a little lacey trim, and used some real lace.

Close up details


The inside section as finished.
Hope you like, :)

Monday, 9 April 2012

Tim Holtz- Card Class

Ok, I've been very "Awl" on here, but today I thought I'd reclaim my blog and show you a couple of little things I've been playing with. Firstly I've refreshed the backdrops and blog title, realised I was perhaps a little too pink, if such as thing is possible. Couldn't believe how much i'd forgotten about how to change all of this stuff, it's funny the older I get, the less my brain seems to want to remember things I knew how to do! Annoying!! Anyway, hopefully everything is now showing correctly.
After a thread on UKs about the Tim Holtz's online card classes, I thought I could do with a bit of useful inspiration, so I signed up. Unfortunately work did kind of get in the way, so I'm quite far behind with progress. I have completed a couple of tags following along with the class, and hopefully I will add to these with other samples, in the weeks to come. I don't own all the items or stamps Tim's used, but have ordered a few bits and made do here and there with what I do have. I'm quite pleased with the final results, and although they are not quite my style, it has really been enjoyable to watch and follow along. I would fully recommend the class, you get much longer video's from Tim and he is more able to really explain, why a product behaves in a certain way. Although I have been crafting a long time, I can honestly say I have learnt more about which product to use and when. It's also really interesting to hear more of Tim's inspiration and what he enjoys in the paper crafting world. Anyway, hope you like my Tim Styled Tags :) Wendy
Blended Spritz and Flick!
Brushless Watercolour
Alcohol Ink Agates- Diff Stamp used to Tims!

Wrinkle Free Distress

Sunday, 19 February 2012

Ukscrappers art journal

Well, I'd decided I would try to do some of the ukscrappers art journal, but as usual I'm unorganised and so started late. I've made a start on making the file, but haven't got much further. By the time I've finished my file the class will be over!!! Useless!! I've made my file from a old ring binder file. The idea is to cut it to the size you want, then use the other waste bits to make the fold over flap that closes the file. I've started to decorate mine, covered the whole file in a rubbish novel, and the started to cover the spine in embossed plumbers metal tape. I'm quite liking how it's starting to look, but still need to decorate the front in someway, goodness knows when I'll get to doing that!!!